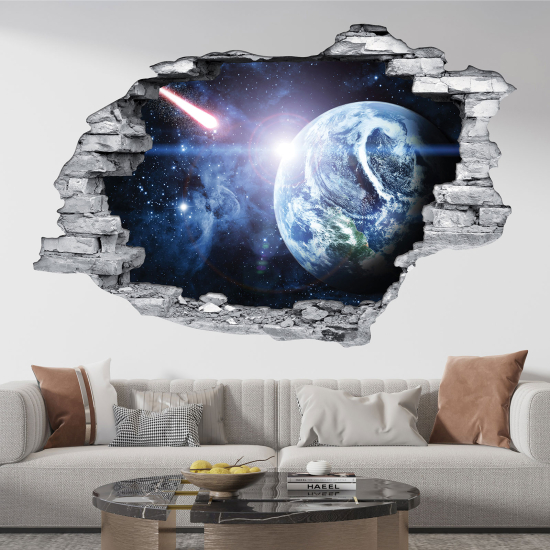
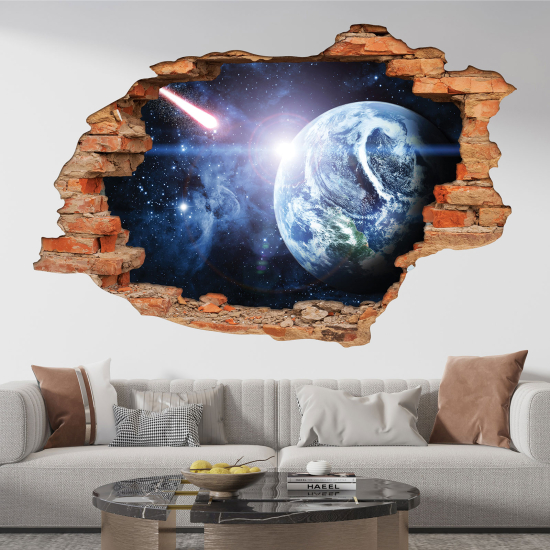
Hole In The Wall Sticker - Optical illusions - Space
Hole In The Wall Sticker - Optical illusions - Space
The art of wall decoration is constantly evolving, and our optical illusion hole-in-the-wall stickers are the latest trend to add a touch of originality to your space. Transform your walls into a work of art that intrigues and surprises with our creative stickers.
Realistic and Surprising: Our optical illusion stickers are designed to create the perfect illusion of holes in the wall. The realistic details, subtle shadows, and depth effects give the impression that your wall has been precisely pierced. Invite your guests to touch and see for themselves that it is merely an illusion.
Versatility of Design: Whether you want to give your space an industrial, modern, or artistic ambiance, our diverse range of designs offers you an array of options to add a touch of realism to your walls. Choose the design that best matches your style.
Ease of Application: Applying our stickers is simple and hassle-free. You don't need to be a decoration expert to create a striking illusion in your interior.
Durability and Quality: Our optical illusion stickers are made from high-quality materials that withstand daily wear and tear. The realistic details and vibrant colours ensure your wall decoration lasts a long time.
Economical and Creative: Transform your walls into an artistic space without the costs and hassles of a real renovation. Our optical illusion stickers are an economical and creative solution to bring a unique touch to your interior.
Conclusion: Our optical illusion hole-in-the-wall stickers allow you to create the perfect illusion in your space. Explore our collection to find designs and patterns that match your personal style. Surprise your guests and create a unique talking point in your home with our creative stickers.
Non-harmful Prints with HP Latex Technology:
We are proud to offer you adhesives printed with HP Latex inks, known for their environmental friendliness. Our inks are non-harmful and do not emit volatile organic compounds (VOCs), making them safe for your family and the planet. You can decorate your surfaces with peace of mind, knowing that our products adhere to the strictest environmental standards.
Standard Matte Adhesive
This adhesive is resistant to water, UV, and light friction.
Its installation ease is rated as: Easy
Fast Delivery and Online Tracking
Our packages are generally shipped within 24 to 48 hours (business days) after your order has been processed and your payment received.
We use the Colissimo tracked service for shipping your order. Once your package has been shipped, we will provide you with a tracking number and a link that will allow you to track your package online in real-time.
The shipping costs include careful packaging of your items, necessary handling, and postal fees associated with delivery.
We strongly recommend that you group your purchases into a single order to take advantage of free shipping.
Installation Instructions for Decorative Stickers without Transfer Tape
Required Materials:
- The decorative sticker
- A felt squeegee (or a rigid card wrapped in a soft cloth to avoid scratching)
- A clean, dry cloth
- Painters tape (recommended)
- A measuring tape or a ruler
1. Prepare the surface
Ensure that the surface where you will apply the sticker is clean, smooth, dust-free, and completely dry. Use a clean, dry cloth to remove any dirt, debris, or moisture.
2. Position the sticker
Place the sticker in the desired location on the surface. If necessary, use painters tape to temporarily hold it in place while you check the alignment.
Use a ruler or measuring tape to ensure the sticker is straight.
3. Apply the sticker
Once the sticker is properly positioned, start peeling back a small portion of the backing paper, exposing the sticker.
While holding the sticker in place, begin to apply it to the surface, gradually peeling off the rest of the backing paper as you go.
4. Smooth the sticker
Use the felt squeegee to smooth the sticker as you apply it. Press gently but firmly, working from the center outward to avoid creating air bubbles.
5. Eliminate air bubbles
If air bubbles appear under the sticker, continue smoothing gently with the felt squeegee. For small bubbles, pierce them carefully with a pin or needle, then smooth again.
6. Remove the painters tape
If you used painters tape to hold the sticker, gently remove it once the application is complete.
Additional Tips:
- Use a felt squeegee to avoid damaging or scratching the surface of the sticker.
- Apply the sticker at room temperature for better adhesion.
- Ensure the sticker is fully smoothed before allowing it to fully adhere to the surface.
That's it! Your decorative sticker has been successfully applied!


